Decision making in Pokémon Emerald's Battle Pike
This post presents a “solution” to the Battle Pike in Pokémon Emerald’s Battle Frontier. I assume you understand a bit about Pokémon, but the section on mechanics should give you enough context to enjoy the decision problem.
Introduction
I recently replayed through the Battle Frontier in Pokémon Emerald for the Ribbon Master Challenge, where you take a Pokémon through all the games they can be transferred into and earn all the available ribbons along the way. You could capture a Pokémon in any game from Ruby & Sapphire to Scarlet & Violet: the only requirement for the title of Ribbon Master is said Pokémon obtaining all Ribbons (and now Marks) they can in the games it can visit. Marks are an extension of Ribbons. Most are earned randomly when a Pokémon is captured, but at least a few can be obtained by fulfilling certain conditions. See 10 for a list.
This time, I decided to take my Arcanine from Pokémon XD through the challenge, and one of its first stops was the Battle Tower in the Battle Frontier. I got through both modes (Level 50 and Open Level) with no major difficulties, but one thing I noticed is that I haven’t earned the Gold Symbols on my physical cartridge; I only played through the Frontier facilities on an emulator. So I took a detour to make this right.
 After losing 2 runs to bad luck and no planning in the Battle Pike, I started searching for suggestions on how to approach it.
I found a post on Reddit with a lot of information on winning strategies, which helped me have an easier time and eventually earn the Gold Symbol, but most interestingly made me realize three things:
After losing 2 runs to bad luck and no planning in the Battle Pike, I started searching for suggestions on how to approach it.
I found a post on Reddit with a lot of information on winning strategies, which helped me have an easier time and eventually earn the Gold Symbol, but most interestingly made me realize three things:
- The state of your team affects the distribution of possible outcomes each round, i.e., what you see in each room depend on the health (also PPs used and presence of status effects) of your Pokémon.
- Furthermore, the risk of each option also depends on the state of your team and how many rounds are left in the challenge. You can take more battles if your team is healthy, or gamble for recovery if you’re almost defeated.
- Thus, the Battle Pike can be understood as a problem of Decision Under Uncertainty, with a corresponding solution in the form of a Decision Table.
Next up I review the mechanics of the Battle Pike before discussing why it’s a problem of this sort.
Battle Pike Mechanics
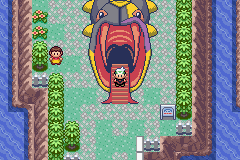
 The Battle Pike is a facility located in the Battle Frontier themed around “luck”.
Each round consists of two rooms: in the first one, you choose one out of three exits, after which you are faced with a randomly selected challenge (listed below).
You win if you manage to survive 7 rounds without your whole team fainting.
The Battle Pike is a facility located in the Battle Frontier themed around “luck”.
Each round consists of two rooms: in the first one, you choose one out of three exits, after which you are faced with a randomly selected challenge (listed below).
You win if you manage to survive 7 rounds without your whole team fainting.
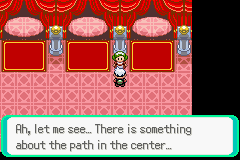
But choosing a room at random would be boring, and that’s why an NPC stationed at each first room predicts what is behind one of the 3 exits. She will specify a door and tell you one of 4 quotes, corresponding to 2 possible challenges. The other unspecified doors can contain any of the other challenges.
The following table describes each quotes and their associated challenges:
| Option | Quote | Result 1 | Result 2 |
|---|---|---|---|
| A | "For some odd reason, I felt a wave of nostalgia coming from it" | Status Condition | One or two recovery |
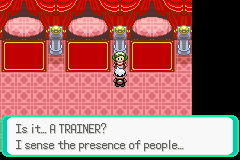
| B | "Is it...A Trainer? I sense the presence of people" | Single Battle | Full Recovery |
| C | "It seems to have the distinct aroma of Pokémon wafting around it" | Wild Pokémon | Hard Single Battle and Recovery |
| D | "I seem to have heard something...It may have been whispering" | No Event | Double Battle |
In addition, the state of your team make some of the outcomes impossible. We could review the source code of the game to verify if that’s really what happens. I might do that eventually. The original Reddit post gives some evidence for that and my personal experience is similar. Some of these situations are as follows:
- If your whole team is afflicted by status (paralyzed, sleeping, burned, or frozen), then a Kirlia or Dusclops cannot show up. Option A will be One or two recovery.
- If your team is in perfect condition (full HP, no PPs used, no status), then there won’t be any form of recovery. So option A will be Status Condition, option B will be Single Battle, and option C will be Wild Pokémon.
- If you have only one Pokémon left, then you cannot play a double battle. Option D will be No Event.
 You team consists of only 3 Pokémon for the challenge and there is no auto-healing between rounds, different from facilities like the Battle Tower and the Battle Factory.
This is the reason random Status Conditions from option A can be a problem: some of your Pokémon will be left sleeping, paralyzed, or frozen and there’s not much you can do outside of hoping for a healing room.
You team consists of only 3 Pokémon for the challenge and there is no auto-healing between rounds, different from facilities like the Battle Tower and the Battle Factory.
This is the reason random Status Conditions from option A can be a problem: some of your Pokémon will be left sleeping, paralyzed, or frozen and there’s not much you can do outside of hoping for a healing room.
In the Wild Pokémon room from option C you are put in a short maze and the objective is just to walk to the end facing random encounters. It is very important to make sure the first Pokémon in your team can run from these encounters to avoid receiving status or wasting PPs unnecessarily.
Finally, you have the option of challenging the Battle Pike at Level 50 or at “Open Level”, which means the opposing NPC’s Pokémon levels will be the maximum value between 60 and the highest level in your team. If your Pokémon are at level 55, opponents will be at 60, and if your highest level is 81, opponents’ will be 81 as well. This is mostly irrelevant for how hard the challenge is, except that at Level 50 you won’t encounter certain Pokémon that evolve past it (e.g., Dragonite, Tyranitar).
That covers the mechanics. Now the question is how to win consistently.
The Decision Problem
The information you have when you enter a room is:
- The state of your team: are your Pokémon healthy or not? How much PP do you still have on the most important moves? Do you still have your items?
- How many rooms do you still have to go through?
- The quote from the NPC describing what’s behind one particular door.
The other 2 exits are random and equivalent, so you either exit through the room the NPC just described or one of them. Which means you have to weight in what can happen at each room by estimating how much you can afford to lose and still be able to complete the challenge. For example, if you have a single Pokémon left and you get the quote “I seem to have heard something…It may have been whispering”, that exit will lead to No Event necessarily, as previously mentioned.
The decision problem, then, lies in judging the current state of your team and seeing what outcomes are possible based on the quote you get. And choosing the ones which maximize the chance you’ll be able to survive all rounds.
Suppose you start a new challenge. Thus, your team is fully healed. The NPC gives you the following hint: “Is it…A Trainer? I sense the presence of people” about the room in the right. What can be inferred from this situation?
That means this room either has a Single Battle or Full Recovery. However, you can’t get a recovery room if your team is fully healed, so you can conclude there’s going to be a Single Battle behind that door.
The other two rooms represent the 6 alternative paths, corresponding to the outcomes from options A, C, and D, due to option B being the one mentioned in the quote. What can happen if you take them are the following:
- Option A (either Status Condition or One or two recovery): you can’t get recovery, so it’s guaranteed Status Condition. Bad!
- Option C (either Wild Pokémon or Hard Single Battle and Recovery): you can’t get recovery, so it’s guaranteed Wild Pokémon. But you made sure (right?) that your first Pokémon is able to run away from these encounters, so this is a free room. Good!
- Option D (either No Event or Double Battle): both can happen, but Double Battles tend to be relatively simple most of the time, and No Event is obviously great. Good!
That means 2 out of 3 possible scenarios for the rooms not mentioned in the quote are Good and you should take them (which one doesn’t matter). You can still get unlucky and get Status Condition (⅓) or a Double Battle (⅙), but it’s better than a guaranteed Single Battle (which we already defined as generally harder than Double Battles).
Now let’s suppose you are at the last room before the challenge ends and it’s not a battle against Pike Queen Lucy. You can only face Pike Queen Lucky after round 2 (14 rooms cleared) and round 10 (70 rooms cleared). The NPC gives you the quote: “For some odd reason, I felt a wave of nostalgia coming from it” on the central path. In this case, you should always go for that door: you either get recovery or status condition, which is not a problem due to this being the last room.
Here are the heuristics described in the original Reddit post, organized as a Decision Table, with additions by me. “Lightly Damaged” means your party has almost 100% HP or used a few PPs, etc; it’s close to Full Health, but recovery rooms will show up.
| Option | Quote | State of your team | ||
|---|---|---|---|---|
| Full Health | Lightly Damaged | Heavily Damaged | ||
| A | "For some odd reason, I felt a wave of nostalgia coming from it" | Rooms 1–6 ✓ ⟶ Guaranteed status effect | Rooms 1–6 ■ ⟶ Gets more dangerous as you progress, with the potential for triple sleep on the sixth room | ✓ ⟶ An extra status effect won't doom you much more than you already are and 1-2 healed Pokémon can save you; Guaranteed no trainer battle on room 7 |
| Room 7 ✓ ⟶ Guarantees no trainer battles | Room 7 ✓ ⟶ Guarantees no trainer battles | |||
| B | "Is it...A Trainer? I sense the presence of people" | ✗ ⟶ Guaranteed single battle with no recovery | ✗ ⟶ The small heal does not justify the risk | ✗ ⟶ The risk only makes sense if your party is so weak that the 50% chance of a full heal seems worth it |
| C | "It seems to have the distinct aroma of Pokémon wafting around it" | ✓ ⟶ Guaranteed Wild pokémon; Use 1 PP here to enable odds of recovery rooms moving forward | ✓ ⟶ You can run from Wild Pokémon and the chance of winning a Hard Single Battle is pretty high while lightly damaged | ✗ ⟶ A hard single battle might end your run |
| D | "I seem to have heard something...It may have been whispering" | ✓ ⟶ ½ chance of neutral/positive outcome instead of ¼ of a neutral/positive outcome in the other rooms | ✓ ⟶ Double battles are generally easy and there's ½ of No Event | ✓ ⟶ It's guaranteed neutral if you only have 1 Pokémon; The odds are better than a regular or hard single battle otherwise |
Conclusion
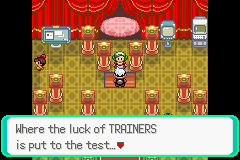
What’s charming about the Battle Pike is that it is upfront about luck: “Where the luck of TRAINERS is put to the test…”. And while that is a frustrating aspect of playing Pokémon, it’s also so characteristic of the series that I cannot think of battling without accounting for it. Some amount of luck is required to win, independent of how much preparation you got.
There’s probably more situations in the series where a Decision Table like the one in this post can be used to describe the solution to a particular challenge. Unfortunately, it’s hard to justify the time investment:
- Outside of Battle Facilities, the in-game challenges are fairly simple and writing a Decision Table for most of it would be a waste of time.
- The complexity of competitive battling makes almost any kind of theoretical treatment worthless. There’s just too much to take into consideration. I might reconsider this once I get to study Game Theory more throughly.
Maybe there are other Facilities where this methodology would be useful? I’ll keep my eyes open next time I play.
References
- This Reddit thread is what inspired me to write this post. ⟶ Advanced Techniques for the Battle Pike (r/PokemonEmerald subreddit).
- Battle Pike on Bulbapedia.
- Battle Frontier on Bulbapedia.
- The generalized term for these minigames is “Battle Facility”:
- There are many reports from people of the Battle Facilities community listing what teams and strategies they used. It’s likely that this post could be augmented by information posted there. ⟶ Battle Pike Records on Smogon.
- Pokémon Emerald Post-Game Checklist.
- Several references on ribbons, marks, and the Ribbon Master Challenge:
- Decompilation of Pokémon Emerald.